 Using POPFile with Courier Email
POPFile is a free, open-source email classification system that can be used to filter SPAM.ĀĀ POPFile is based on Bayesian processing, which means that after a short "training period" the program can "predict" which messages you receive are SPAM.
POPFile can be used as a very sophisticated email classification system, filtering mail into a large number of different categories (or what it refers to as "buckets").Ā But for our basic purpose of filtering between SPAM and Not SPAM we can use a very simple configuration of the program.
This short guide will help you through the process of installing and configuring POPFile and Courier Email to be used together.Ā For more advanced information on either POPFile's classification abilities or Courier Email's filtering functions, please refer to the respective program's Help files.
Downloading and Installing POP File
You can download POPFile from http://popfile.sourceforge.net/
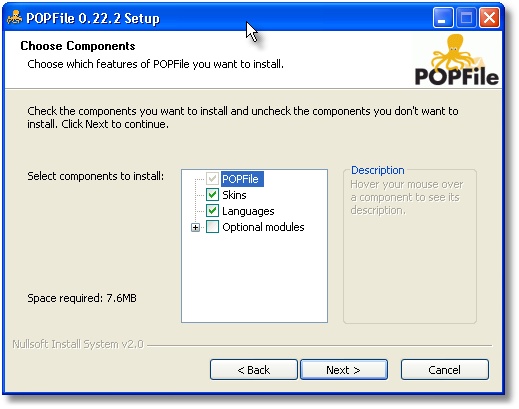
During installation you do not need to install any of the "Optional Modules"
After installing you will be prompted that some basic program configuration is required.
First you need to select the data location for your files, unless you have some reason to change this then the default should work fine.
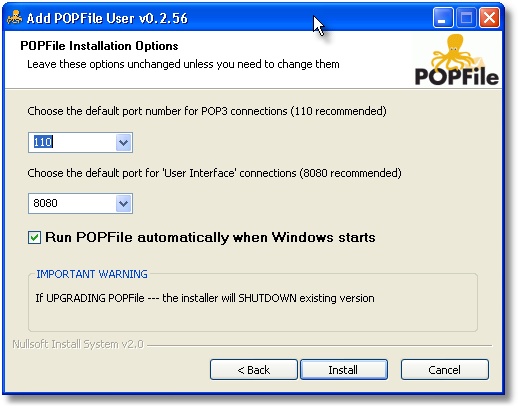
In most cases the default settings for ports are the best option.Ā It is also useful to have the program start automatically with Windows.
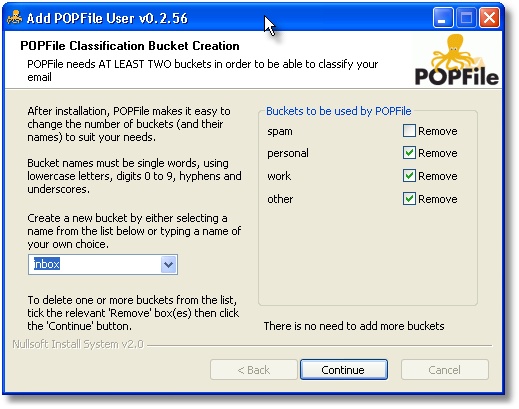
Now it's time to create the "buckets" POPFile will classify messages into.Ā For the simplest anti-SPAM setup, delete the default buckets other than "spam" and add one named "inbox".Ā
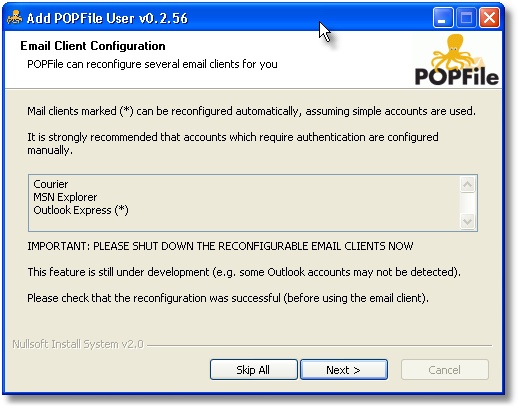
Although POPFile indicates it will automatically configure Courier, this does not appear to work in many cases.Ā You can just skip this or click Next.
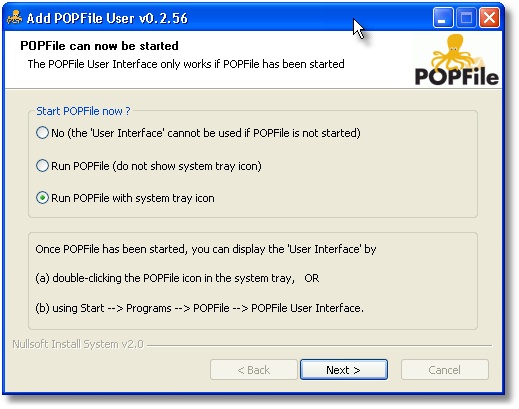
It is now time to start POPFile.Ā Use the system tray icon option which will place a program icon in the tray from which you can access the user interface (web browser based) by double-clicking on the tray icon.
Now there are just a couple more settings to verify before proceeding.Ā Go ahead and launch the POPFile user Interface by double clicking on the tray icon.
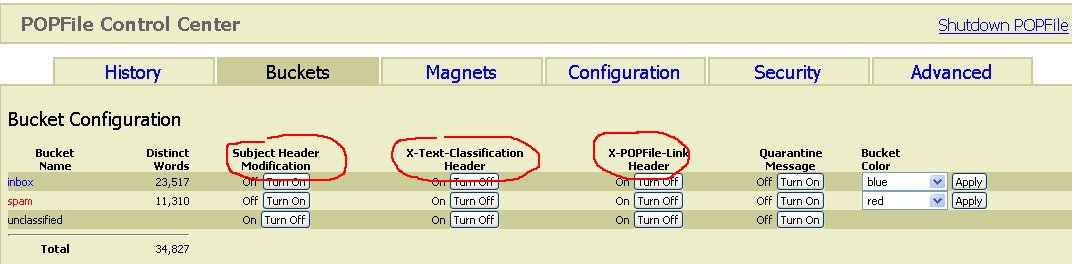
There are three setting to pay attention to.
Subject Header Modification:Ā This will add [inbox] or [spam] to the beginning of the subject field of all incoming messages.Ā Since you can configure Courier to look for message classification information in a message header, unless you have a specific reason for using this optionĀturn itĀOff.
X-Text-Classification Header:Ā This option will a new X-Text-Classification: header to your incoming messages that we can use to filter out the SPAMĀusing Courier's filters.Ā Make sure this option in On.
X-POPFile-Link Header:Ā This option will ad another optional header to your message that you can use to accessĀany mis-classified messages directly from Courier in order to re-classify them.Ā This is important during the first few days you use the program as you "train" it to recognize what you consider SPAM.Ā Make sure this option is On.
Configuring Courier
Now you are ready to configure Courier to collect mail through POPFile.
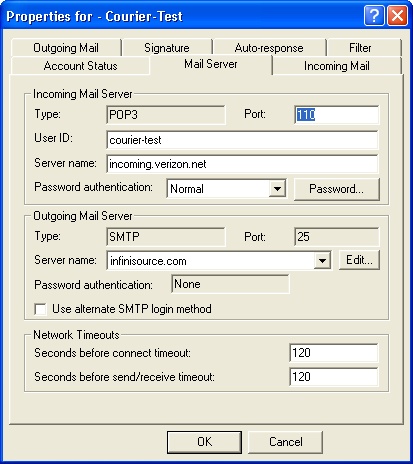
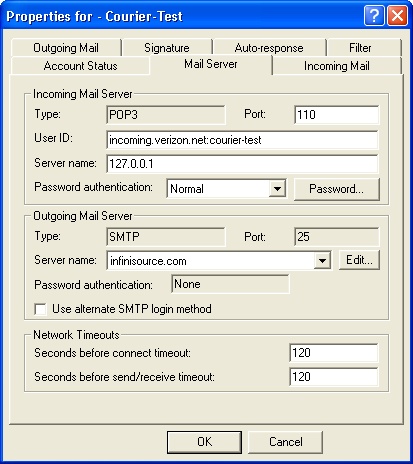
Open the account you want to configure by clicking on the Accounts folder in the Courier folder list, and then double-clicking on the desired account in the Summary Pane.Ā Next, click on the Mail Server tab.Ā Basically you just need to chance the UserID to the following standard:
servername:username
and then chance the server name to 127.0.0.1 (this is the IP address for "localhost", meaning a server running locally).
So for example, if the existing account setting are like this:
Then the User ID and Server name would be changed to:
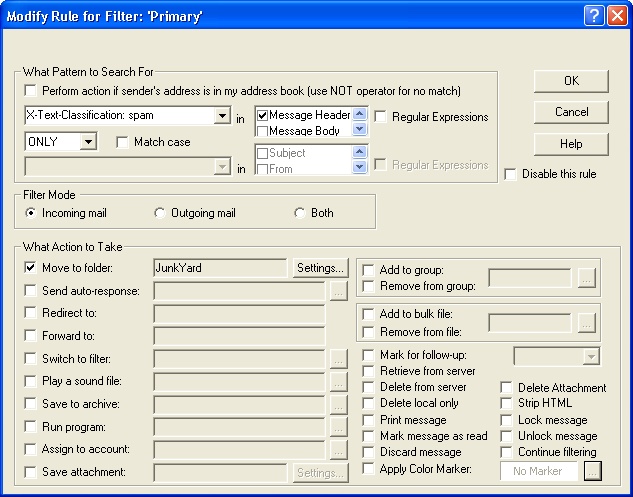
Now that Courier is configured to collect mail via POPFile, the last configuration step is to create a filter that looks for POPFile's classification header in order to place the SPAM mail into the JunkYard folder (or the SPAM folder of your choice).Ā The easiest method to do so is to look for messages with the X-Text-Classification: spam header that POPFile adds.
Remember, you can only assign 1 filter definition to automatically run for an account, but that definition can have as many different rules in it as you need.